I have been making these for some time, they are quite simple, but they do take some preparation time and you need to make sure you have prepared for more children than will turn up, because whipping up another at the last minute isn’t straightforward. Before we start, I must mention it couldn’t have been completed without the artwork of Martin Young at bible cartoons.
Here is the full how to for ‘Damascus Lanterns’
Materials :
1 half litre drinks bottle per child (this is a craft you need to save up for)
10 cm of 1cm wide ribbon per child
one electric candle per child (i found these in packs of 4 at a pound shop)
tissue paper
A4 thin card or paper
image of Saul on the road to Damascus image (I found mine on https://www.biblecartoons.co.uk/)
craft knife
coloured sticky tape
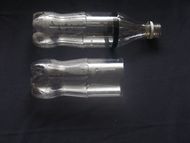 |
You need to start with a half litre drinks bottle, though it does work with bigger bottles. Generally, the straighter the sides are the better. Cut off the top of the bottle and throw it away, you need the bigger piece for the lantern body |
| Wrap the cut edge in tape. The plastic looks neater and it covers the sharp edges. The easiest way is to wrap around the outside and fold the tape inside |
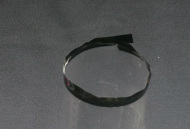 |

| Use the hole punch to make 2 holes on either side for the handle. If you have a single hole punch this is much easier to handle, or an awl would work too. Through these holes you need to tie on the ribbon to form a handle. Double knot the ribbon round the plastic, don’t use a big knot hoping it will hold as the knot will get tighter and come loose. |
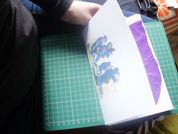
| Now you have your lantern you need something to go inside. The light passes through paper and tissue paper easily. The effect is produced by having a window cut into the paper decreasing the layers and so giving more light in places. A sheet of A4 folded in half will fit inside the bottle with a bit sticking out. You need to trim the excess according to you bottle size. Place your outside image on one half of the paper and your window on the other half. |
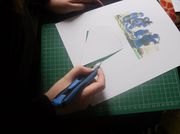 |
I made my window the shape of a pool of light. I removed the background of the image too. Print out your image and then trace where you want your light on a separate sheet.
 |
Tissue paper in the window will give a coloured effect. Sandwich tissue paper to add colour. The photographed example had thin strips of colour, some children had more of a patchwork effect. The darker the colour the harder it is for light to pass through. |
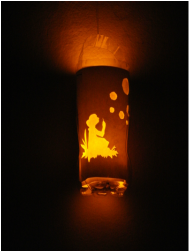
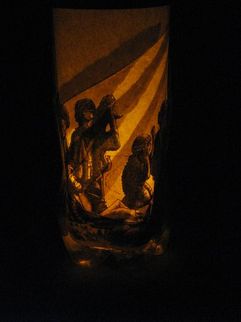
| Finally slip the rolled up paper back in the bottle, turn on an electric tea-light candle and drop it into the bottom. It’s hard to photograph but it really is effective. I’d recommend a dark spot for the kids to test it out in if that’s possible! | 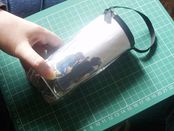 |
Another example : (for reference the little girl blowing bubbles was a cut out stencil on white card with white paper behind, she appeared brighter because of the thickness of the card and thinness of the paper)